Difference between revisions of "Apollo 11 - High Performance Battery Operated B&W Ultrasound Machine"
| (14 intermediate revisions by the same user not shown) | |||
| Line 4: | Line 4: | ||
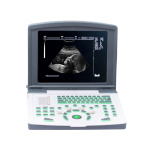
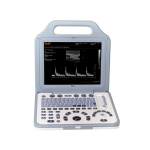
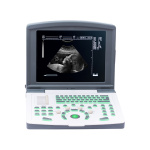
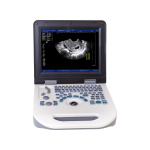
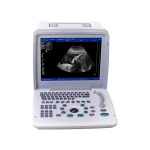
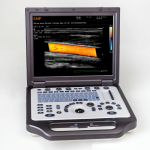
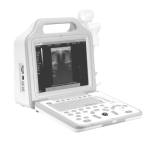
|description= This is quite professional Ultrasound Machine with high imaging quality, long run battery back up and amazing stability. | |description= This is quite professional Ultrasound Machine with high imaging quality, long run battery back up and amazing stability. | ||
}} | }} | ||
| − | |||
| − | |||
| − | |||
| − | |||
{| style="background-color: #white; width: 85%; margin: auto; text-align:left" | {| style="background-color: #white; width: 85%; margin: auto; text-align:left" | ||
| | | | ||
| − | { | + | {{Announcement}} |
| − | + | {{ContactUs}} | |
| − | |||
| − | |||
{{Ticker 1}} | {{Ticker 1}} | ||
| Line 22: | Line 16: | ||
{|style="background-color: #white; width: 60%; margin: auto; text-align:left" | {|style="background-color: #white; width: 60%; margin: auto; text-align:left" | ||
! style="text-align:center; color: #28136d; background-color:##eae8e0" width:60%; |[[Apollo 11 - High Performance Battery Operated B&W Ultrasound Machine | Apollo 11 ]] | ! style="text-align:center; color: #28136d; background-color:##eae8e0" width:60%; |[[Apollo 11 - High Performance Battery Operated B&W Ultrasound Machine | Apollo 11 ]] | ||
| − | |||
| − | |||
| − | |||
|- | |- | ||
! style="text-align:center; color: #28136d; background-color:##eae8e0" width:60%; | [[Apollo 11 - High Performance Battery Operated B&W Ultrasound Machine | High Performance Battery Operated B&W Ultrasound Machine ]] | ! style="text-align:center; color: #28136d; background-color:##eae8e0" width:60%; | [[Apollo 11 - High Performance Battery Operated B&W Ultrasound Machine | High Performance Battery Operated B&W Ultrasound Machine ]] | ||
|} | |} | ||
| + | __NOTOC__ | ||
| + | {| style="color: black; text-align:center;" | ||
| + | | style="height:10px; width:120px; text-align:center; background-color: #A1BCF3;"| | ||
| + | '''[[Apollo 11 - High Performance Battery Operated B&W Ultrasound Machine| Specifications ]]''' | ||
| + | | style="height:10px; width:120px; text-align:center; background-color: #A1BCF3;"| | ||
| + | '''[[Apollo 11 - High Performance Battery Operated B&W Ultrasound Machine - Video| Video ]]''' | ||
| + | |} | ||
===Technical Specification === | ===Technical Specification === | ||
| − | {| class="wikitable" style="background-color: #white; width: | + | {| class="wikitable" style="background-color: #white; width: 100%; margin: auto; text-align:left" |
| style="width: 20%;|B&W mode: | | style="width: 20%;|B&W mode: | ||
| B,M,2B,B/M,4B | | B,M,2B,B/M,4B | ||
| Line 57: | Line 55: | ||
=== Imaging Processing === | === Imaging Processing === | ||
| − | {| class="wikitable" style="background-color: #white; width: | + | {| class="wikitable" style="background-color: #white; width: 100%; margin: auto; text-align:left" |
| style="width: 20%; | Pre-processing: | | style="width: 20%; | Pre-processing: | ||
| | | | ||
| Line 79: | Line 77: | ||
=== Functions === | === Functions === | ||
| − | {| class="wikitable" style="background-color: #white; width: | + | {| class="wikitable" style="background-color: #white; width: 100%; margin: auto; text-align:left" |
| style="width: 20%;|Cine-loop: | | style="width: 20%;|Cine-loop: | ||
| 334 frame cine loop memory | | 334 frame cine loop memory | ||
| Line 100: | Line 98: | ||
=== Measurement & Calculations === | === Measurement & Calculations === | ||
| − | {| class="wikitable" style="background-color: #white; width: | + | {| class="wikitable" style="background-color: #white; width: 100%; margin: auto; text-align:left" |
| style="width: 20%; |B mode: | | style="width: 20%; |B mode: | ||
| Distance, angle, area, volume, trace length, distance ratio | | Distance, angle, area, volume, trace length, distance ratio | ||
| Line 112: | Line 110: | ||
=== Others === | === Others === | ||
| − | {| class="wikitable" style="background-color: #white; width: | + | {| class="wikitable" style="background-color: #white; width: 100%; margin: auto; text-align:left" |
| style="width: 20%;|Transducer connector: | | style="width: 20%;|Transducer connector: | ||
| 2 active transducer connector ports | | 2 active transducer connector ports | ||
| Line 160: | Line 158: | ||
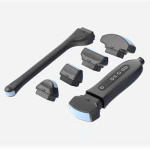
* 5.0 MHz micro-convex probe | * 5.0 MHz micro-convex probe | ||
|} | |} | ||
| − | |||
Revision as of 19:36, 8 December 2018
|
|